Captr is your always-on macOS menu bar companion for screenshots and screen recordings
Captr is your always-on macOS menu bar companion for screenshots and screen recordings. It watches your chosen folder in real time and automatically files every new capture exactly where you want it - no more cluttered Desktop, no more hunting through Downloads.

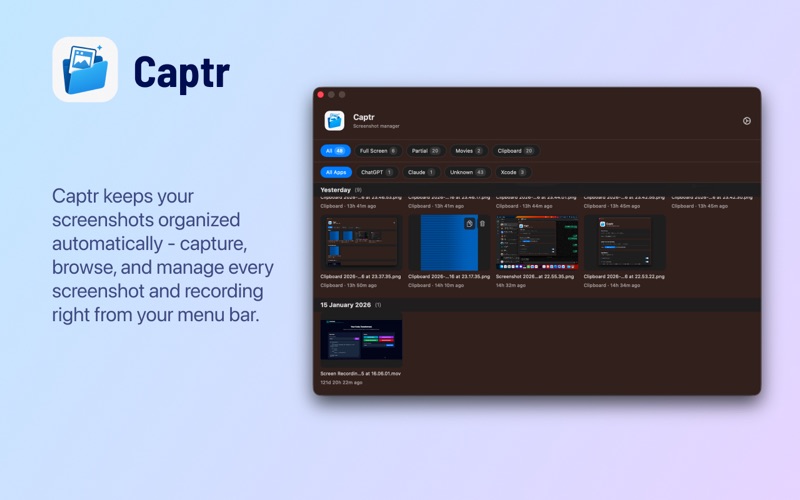
Open the Captr icon to instantly browse your recent screenshots, copy any capture to the clipboard, or jump straight to it in Finder. Need more? The full Screenshots window lets you browse, filter, and manage your entire collection at a glance.


Key Features

• Auto-Sort on Capture
   Every new screenshot (⌘⇧3, ⌘⇧4) and recording (⌘⇧5) is automatically moved to the folder you choose - your Desktop stays tidy without lifting a finger.
• Browse Your Full Collection
   Filter by Full Screen, Partial, Movies, Clipboard captures, or by source app - see every screenshot from Figma, Safari, Xcode, and more in one click.
• Clipboard Capture
   Screenshots copied to the clipboard are saved automatically, so nothing slips through the cracks.
• Flexible Grouping
   Organize captures by date, by application, or both - tailor Captr to your workflow.
• Quick Actions
   Copy any screenshot to the clipboard, reveal it in Finder, or delete it - all without leaving Captr.
• Custom Destinations
   Set separate folders for screenshots and recordings.
• Auto-Recovery
   Accidentally delete a destination folder? Captr recreates it automatically.
• Configurable Delete
   Choose to move deleted screenshots to Trash or permanently remove them - with a confirmation thumbnail so you always know what you're removing.
• Lightweight & Unobtrusive
   Lives quietly in the background. Enable the menu bar icon for quick access, or run completely silently with no Dock icon and no status bar item - Captr keeps watching either way. Launches at login so it's always ready.


Why Captr?

Stop losing captures to the wrong folder. Stop context-switching to Finder just to find a screenshot. Captr keeps everything organized so you can stay focused on your work.


Getting Started

1. On first launch, grant access to the folder where your screenshots are saved (typically Desktop).
2. Open Settings to choose your destination folders for screenshots and recordings.
3. Optionally enable the menu bar icon for quick one-click access to your recent captures, or choose "Keep Running in Background" to run silently with no visible presence.
4. Take screenshots as usual - Captr handles the rest.


Support & Feedback

Captr is under active development. For feature requests, bug reports, localization help, or general feedback, reach out at [email protected].


Privacy

Captr operates entirely on your device. No screenshots, recordings, or personal data are ever uploaded, shared, or transmitted. All file access is limited to the folders you explicitly grant permission to.


Enjoy a cleaner, more organized workflow - one capture at a time.